
Learning CSS the Practical Way: Blog 1 - CSS baby Steps & CSS Selectors


Hey everyone😃, welcome to my first Blog. In the Journey of Web Development, most newbies face difficulty in understanding CSS. So, with this blog series{YES, a series of practical tips in CSS 😁} I aim to make the experience of the beginners a bit easier and full of fun.
The first question that arises is- What is CSS? Why do we need it?
CSS stands for Cascading Style Sheets. It is a style sheet language used for describing the presentation of a document written in a markup language such as HTML. (Huhh, that doesn’t seem helpful at all 😑)
Okay, let me put it in simpler words!
CSS is used to "beautify" our documents. While HTML files define the structure of a document, CSS is used to make it visually appealing.
CSS is analogous to adjectives used in sentences.
HTML -> Noun
CSS -> Adjective
JavaScript -> Verb
for ex: The blue robot clapped.
Here, blue is an adjective and it tells us the colour of the robot similarly CSS tells us the visual appearance of the web page.
I guess, by now you must have a basic idea of what CSS is. Now, we need to learn how to link CSS with our HTML page. There are three ways to do this:
a. Inline styles
It refers to writing styles directly inline with each element.
Tip: It is not a good idea and is not preferred most of the time.
b. The <style> element
We can write all our styles inside <style> tag which is included inside the <head> tag of the HTML file.
Tip: It is easy to do but doing this makes it impossible to share styles between different documents.
c. External Sheet
The most preferred way of adding styles is using an external style sheet. All the desired styles are specified in this sheet and it is connected to the HTML file by using <link> tag added in the head of the HTML file.<link rel="stylesheet" href="your_css_filename.css">
Now, let’s discuss the meat of the section.
CSS Selectors
Since the linking is done, next we have to apply styles to them.
For this, we need to select the targeted element and make the desired style change. There are different ways to do so:
Before moving forward, you should know that a basic pattern is followed in CSS:
selector {
    property: values
}
a. Universal Selector
It selects every possible element on the web page.
Tip: Not a good idea and is rarely used.
Syntax:
* {
    property: values
}
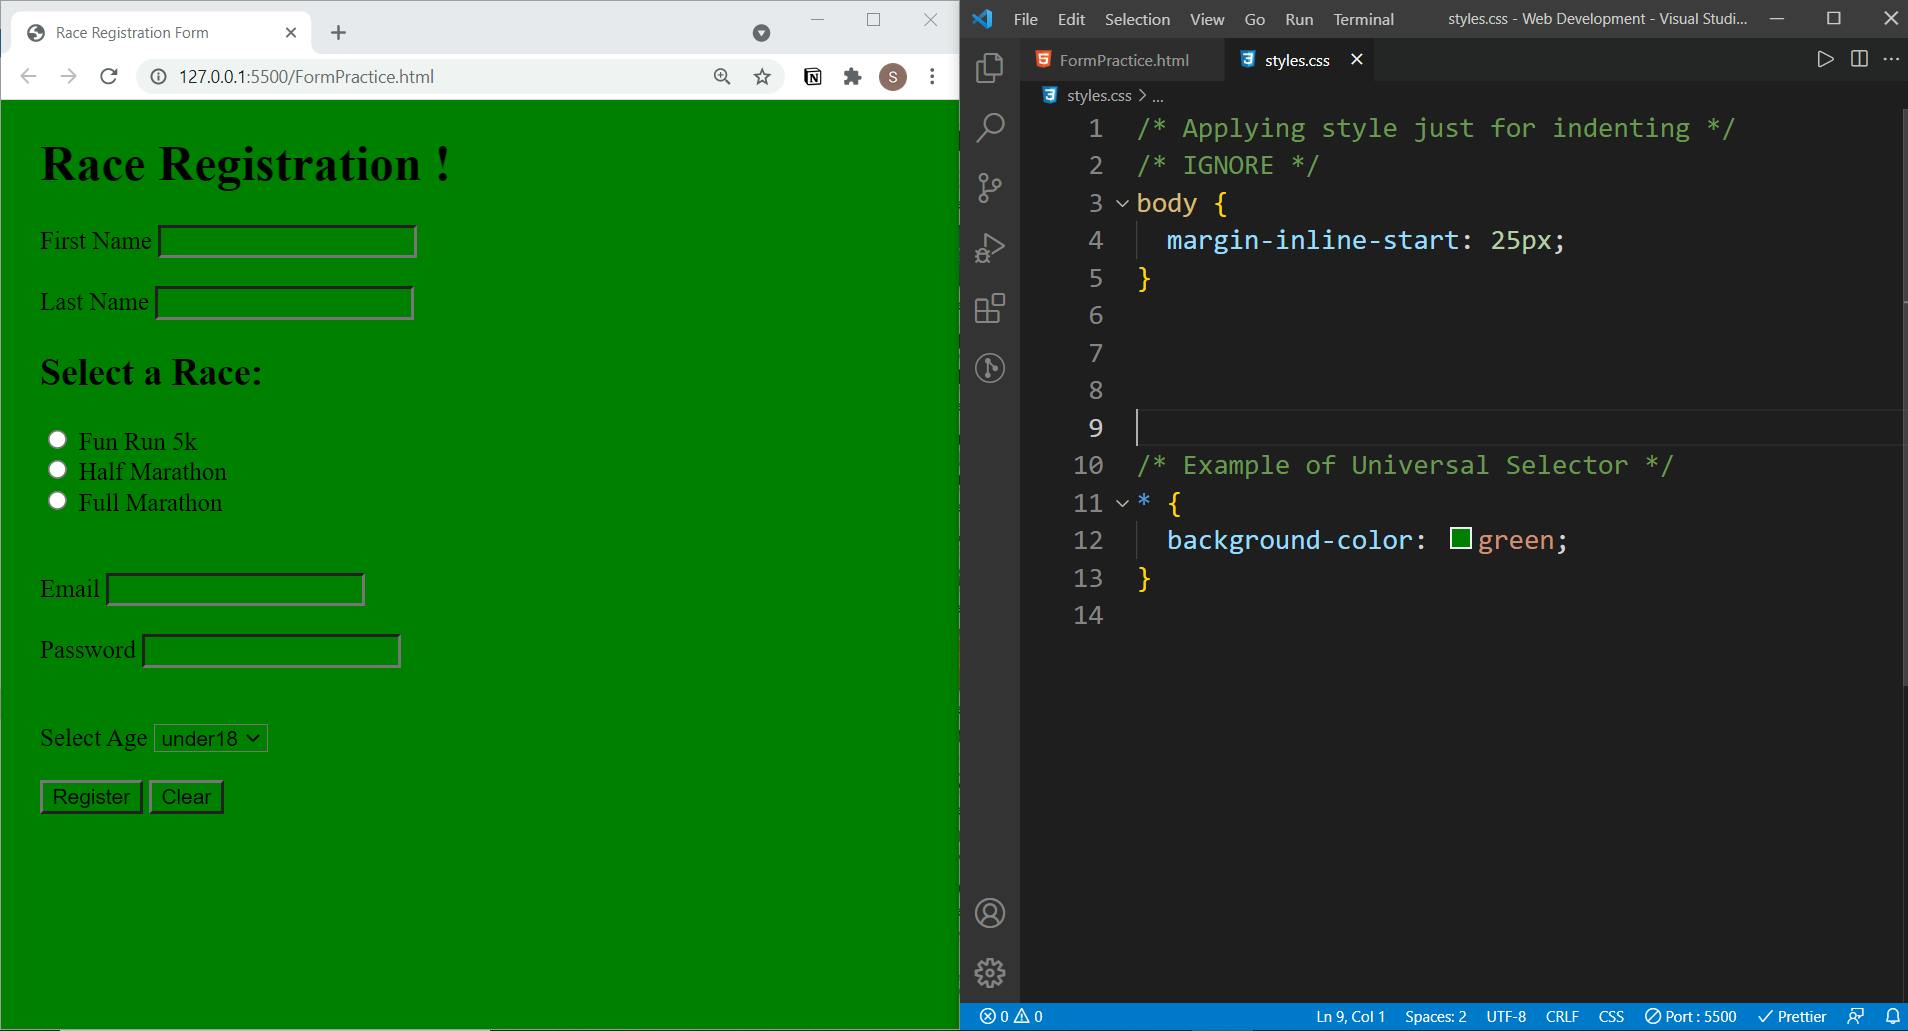
In the above example, the background of the web page, the background of the button, and the background of all the input become green.
b. Element Selector
It is one of the most commonly used selectors. It selects all the same types of an element present on the web page.
Tip: It is used when we have two or more elements that we want to style similar.
General Tip: We use commas to combine multiple selections of elements (more generally selectors).
Syntax: element_name { property: values }
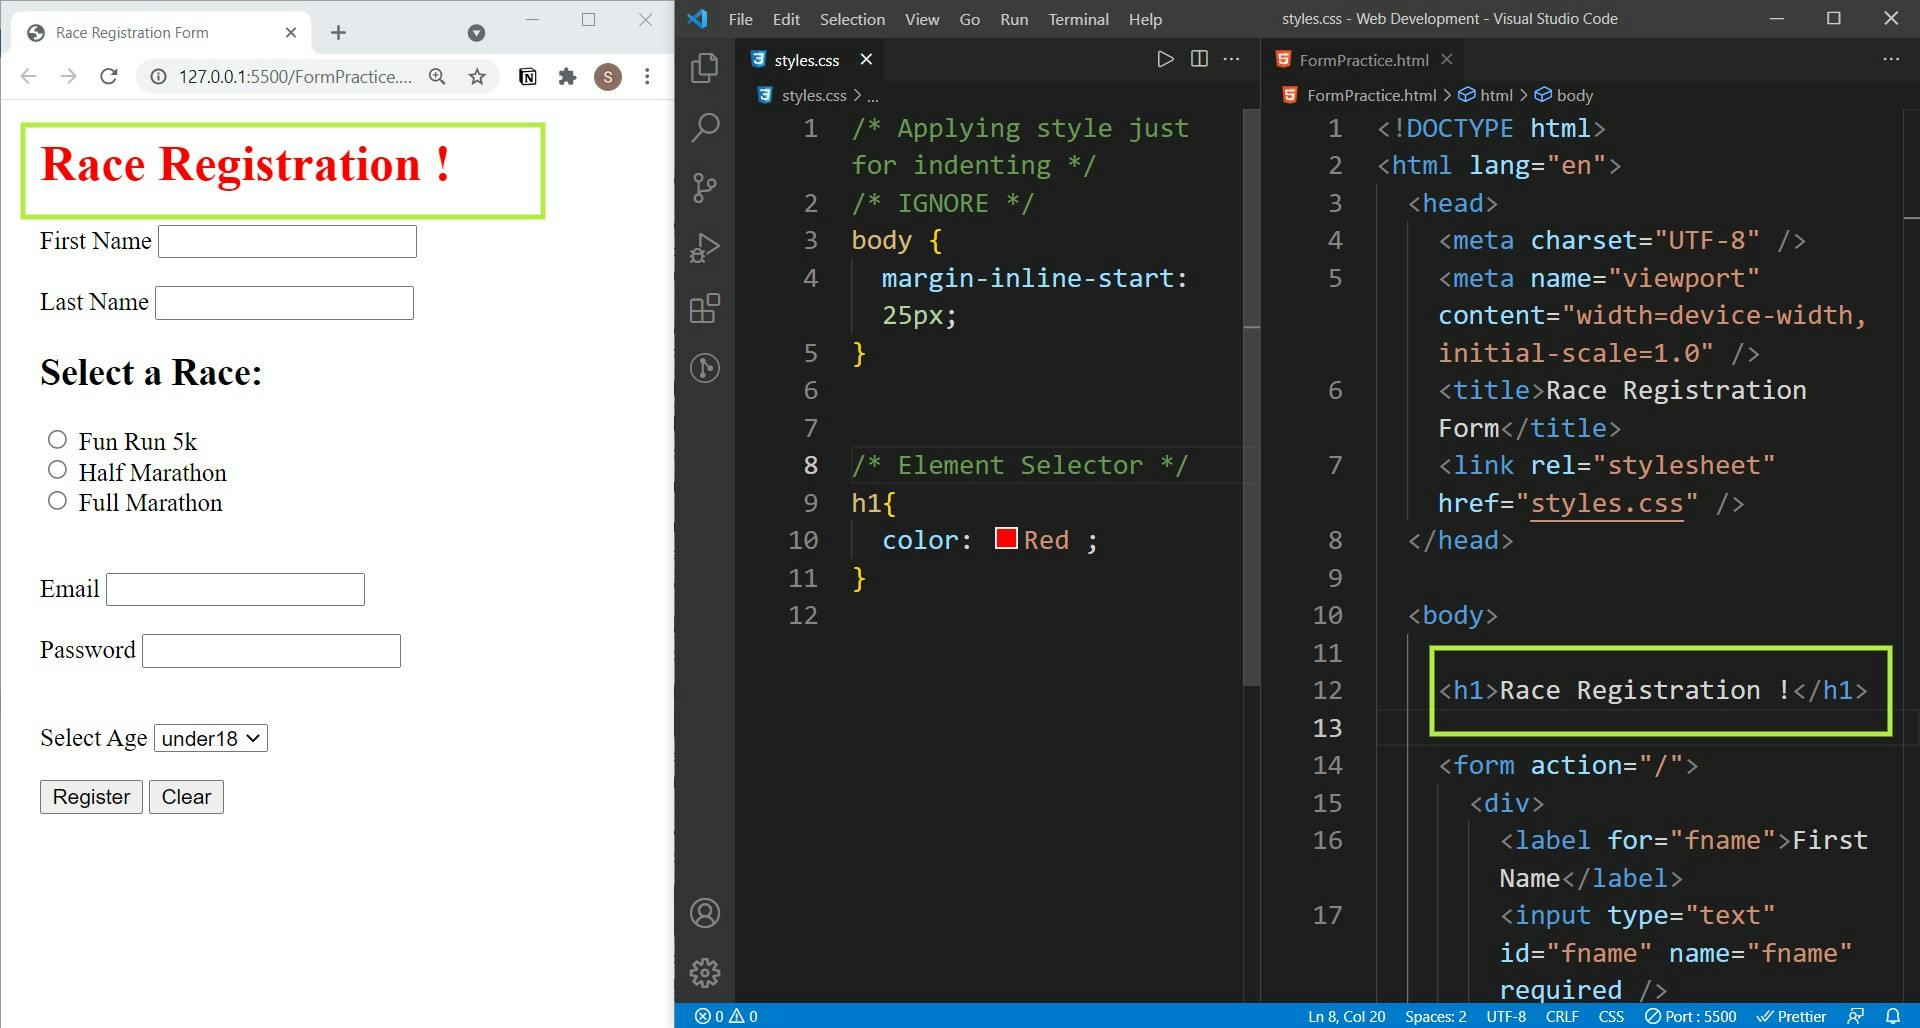
In the above example, we select the <h1> element and change its text color to red.
c. Id Selector
It singles out the element on a web page. '#' symbol is used.
{id attribute is used in HTML to provide a hook to single out the elements}
Tip: It is used when one particular element is needed to style differently. Every element in the HTML file should have a unique id.
Syntax: #id_name { property: values }
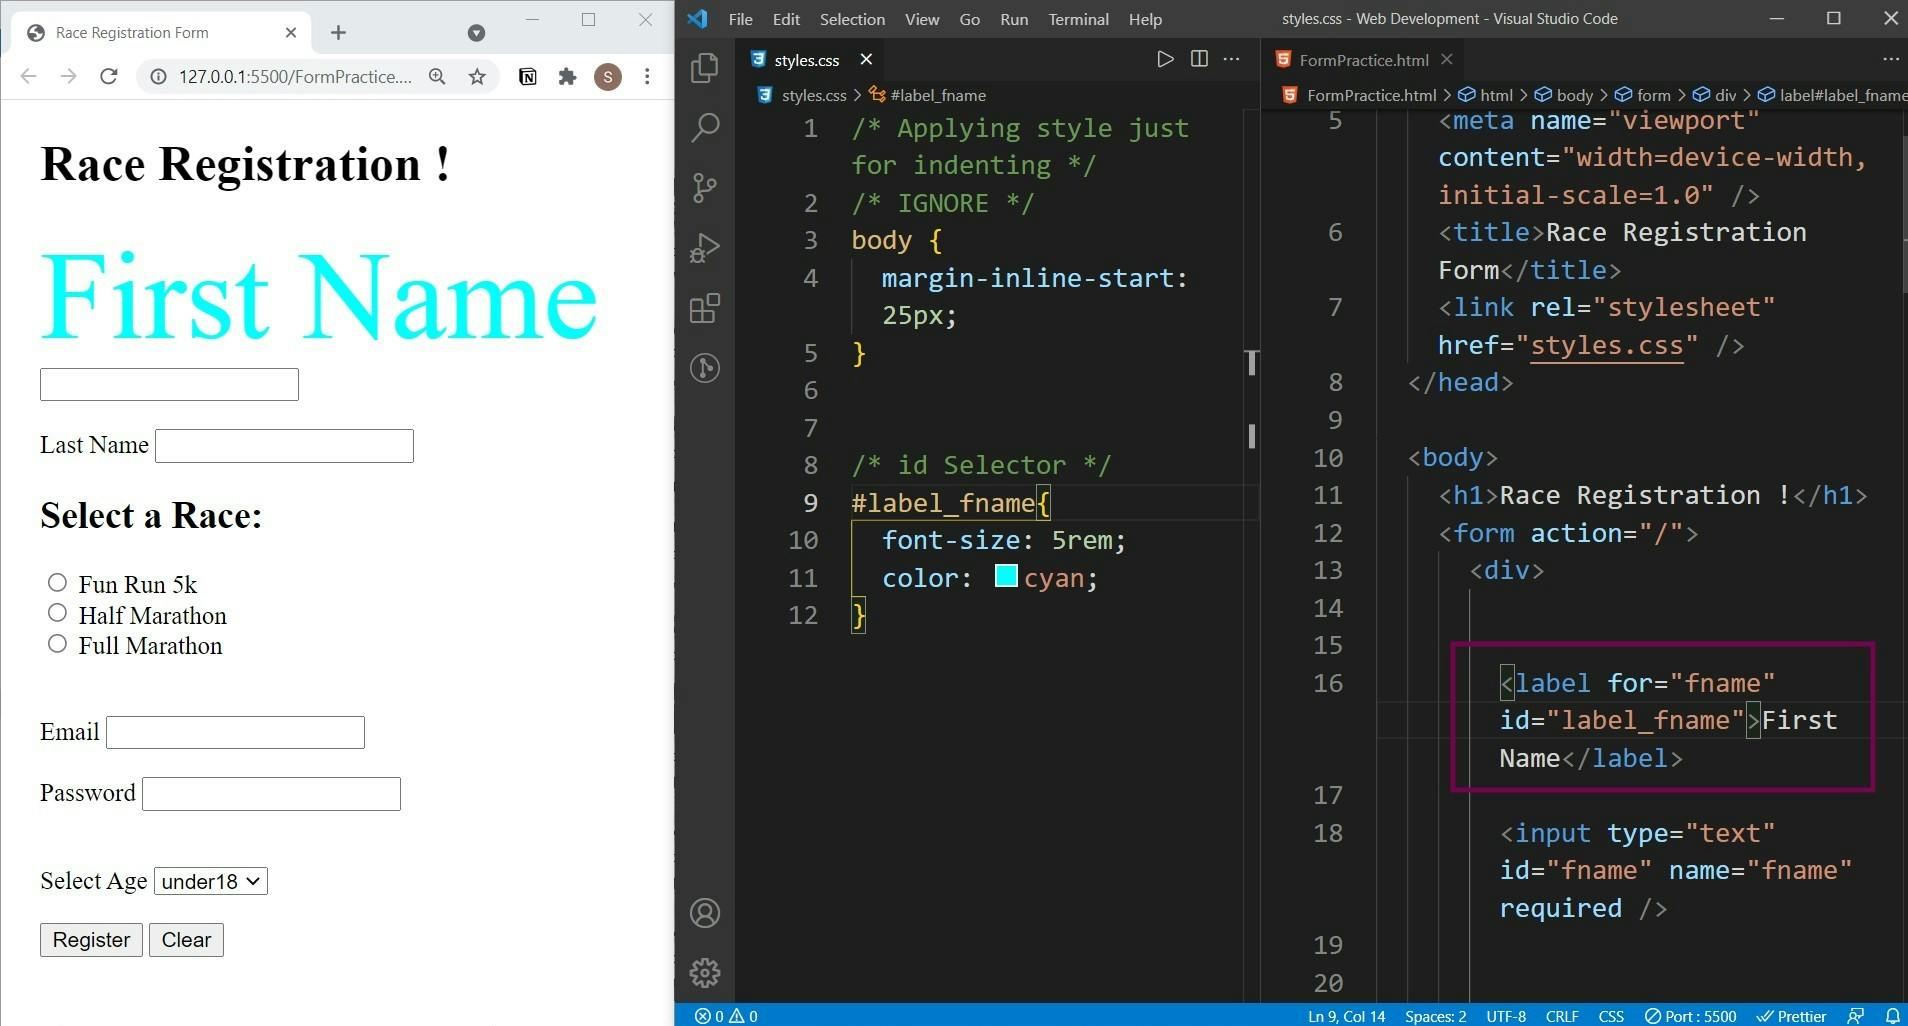
In the above example, we select the <label> element having id = "label_fname" increasing its font size and changing its text color to cyan.
d. Class Selector
This selector is very frequently used to apply styles. It’s used to style a group of things similarly. Multiple classes can be applied to a single element. '.' symbol is used.
{class attribute having the same name is used in HTML to provide a hook to group elements.}
Syntax: .class_name { property: values }

In the above example, we select the <label> element having class = "label-name" increasing its font size and changing its text color to violet. You can observe that by using only one class selector we are changing the styles of two elements.
e. Attribute Selector
This selector allows us to select elements based upon some particular attributes. It can be used to select single or multiple elements.
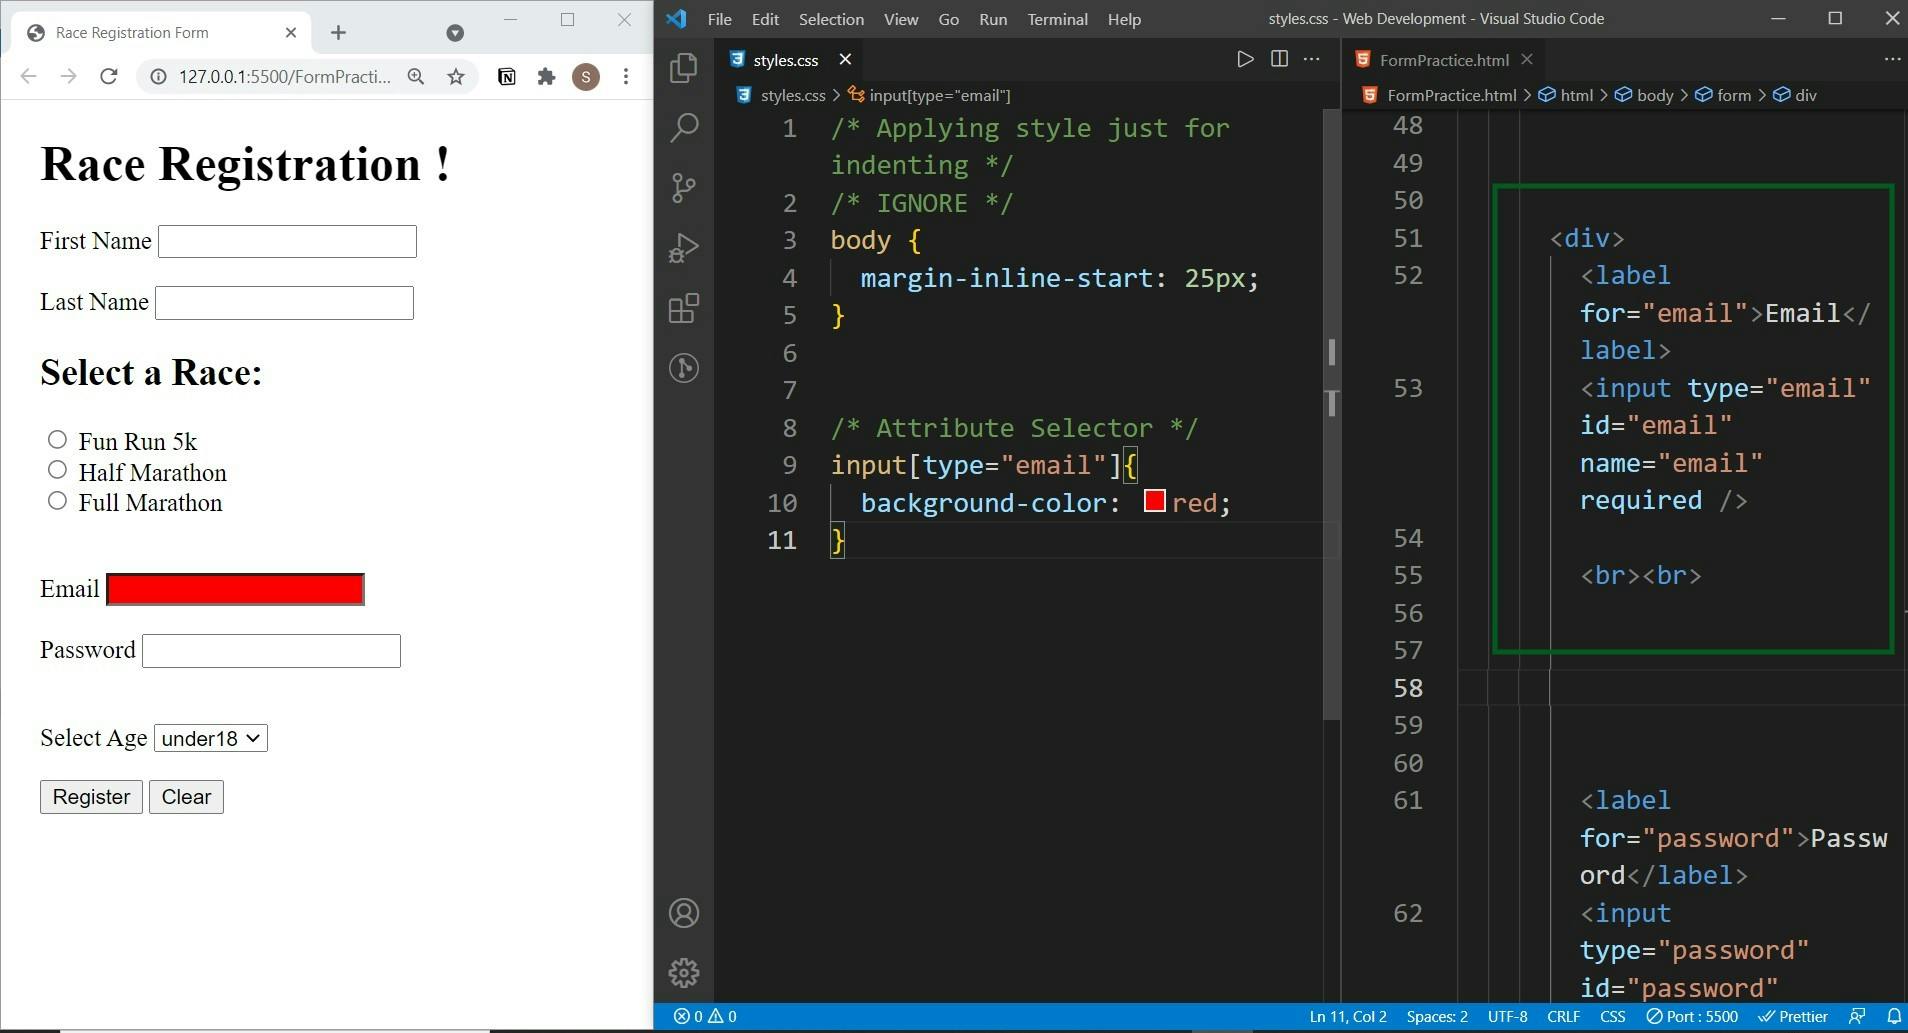
In the above example, we are selecting an <input> element based on the attribute value of "type", here type = "email". We change the background color to red.
f. Descendant selector
This selector is used to select elements that are nested inside other elements. Space is used between the two different selectors.
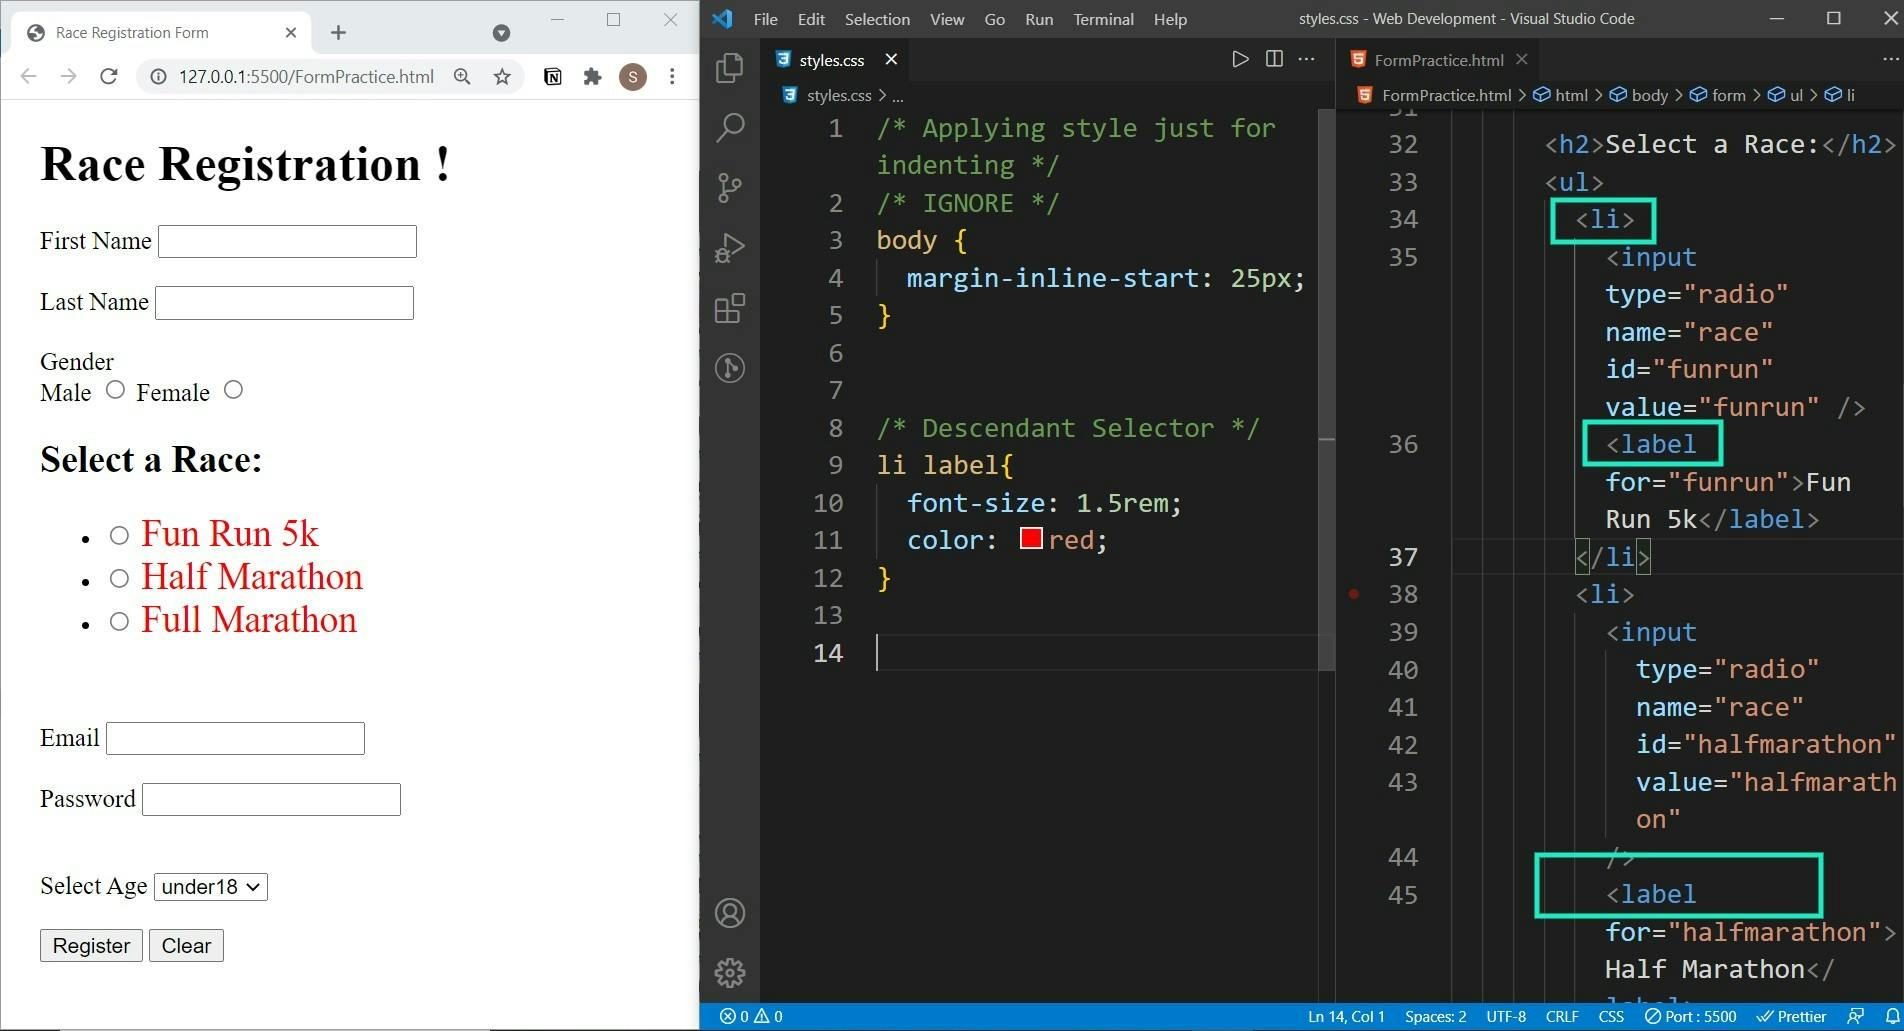
In the above example, all the <label> element of <li> is selected and the font size is increased and the text color is changed to red. It does not matter even if the label elements are nested deeper, the styles will be applied to them.
Tip: Remember the use of "Space" is different than a "comma", a comma is used to combine the selection of multiple elements whereas space is used in descendant selector.
Some lesser-known { and less frequently used } selectors are:
a. Adjacent Selector
It applies styles on the second element which comes just after the first element and is on the same level i.e second element is not a child of the first. '+' symbol is used. Technically, it’s called a Combinator { as it combines two or more selectors}.
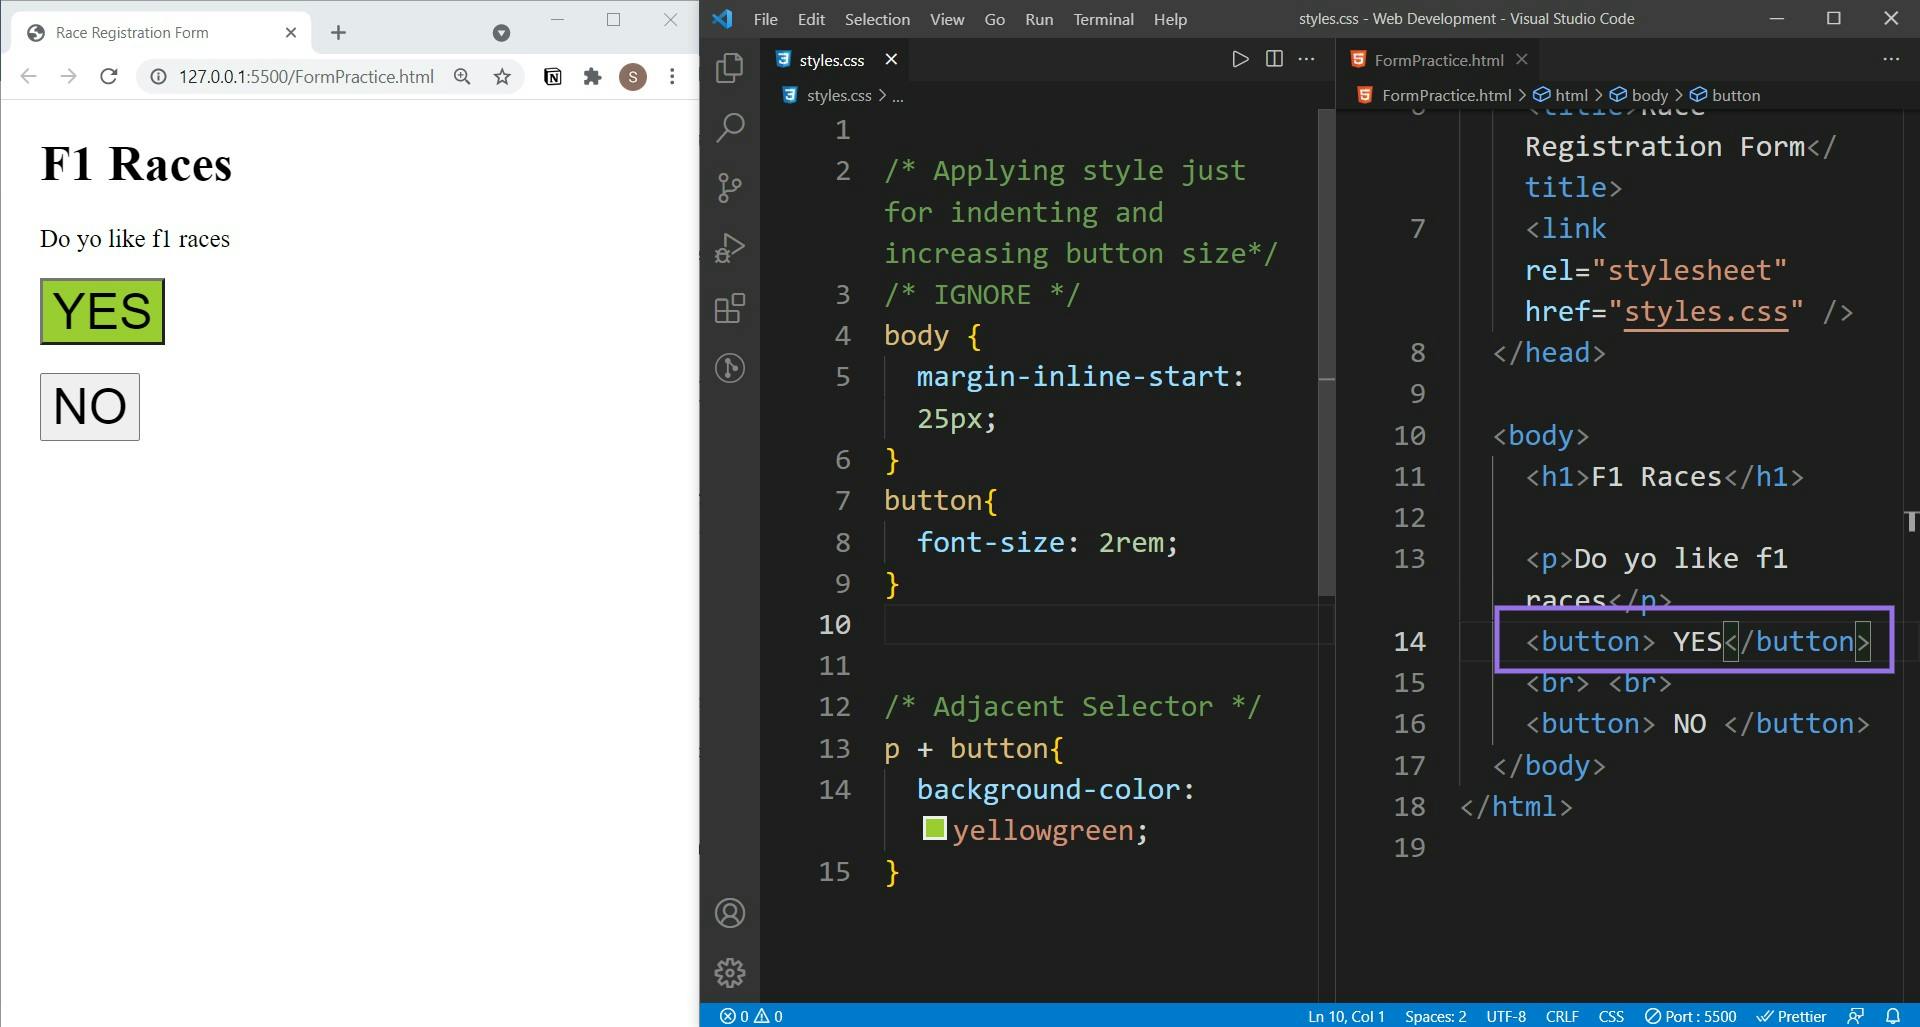
In the above example, only the <button> just followed by <p> is affected. The other button remains unchanged.
b. Direct child Selector
This selector selects the direct descendant of an element. It only considers the element in the first level. The deeper nested elements have no effect. For instance, if the second element is the direct child of the first only then the applied style will work. '>' symbol is used.
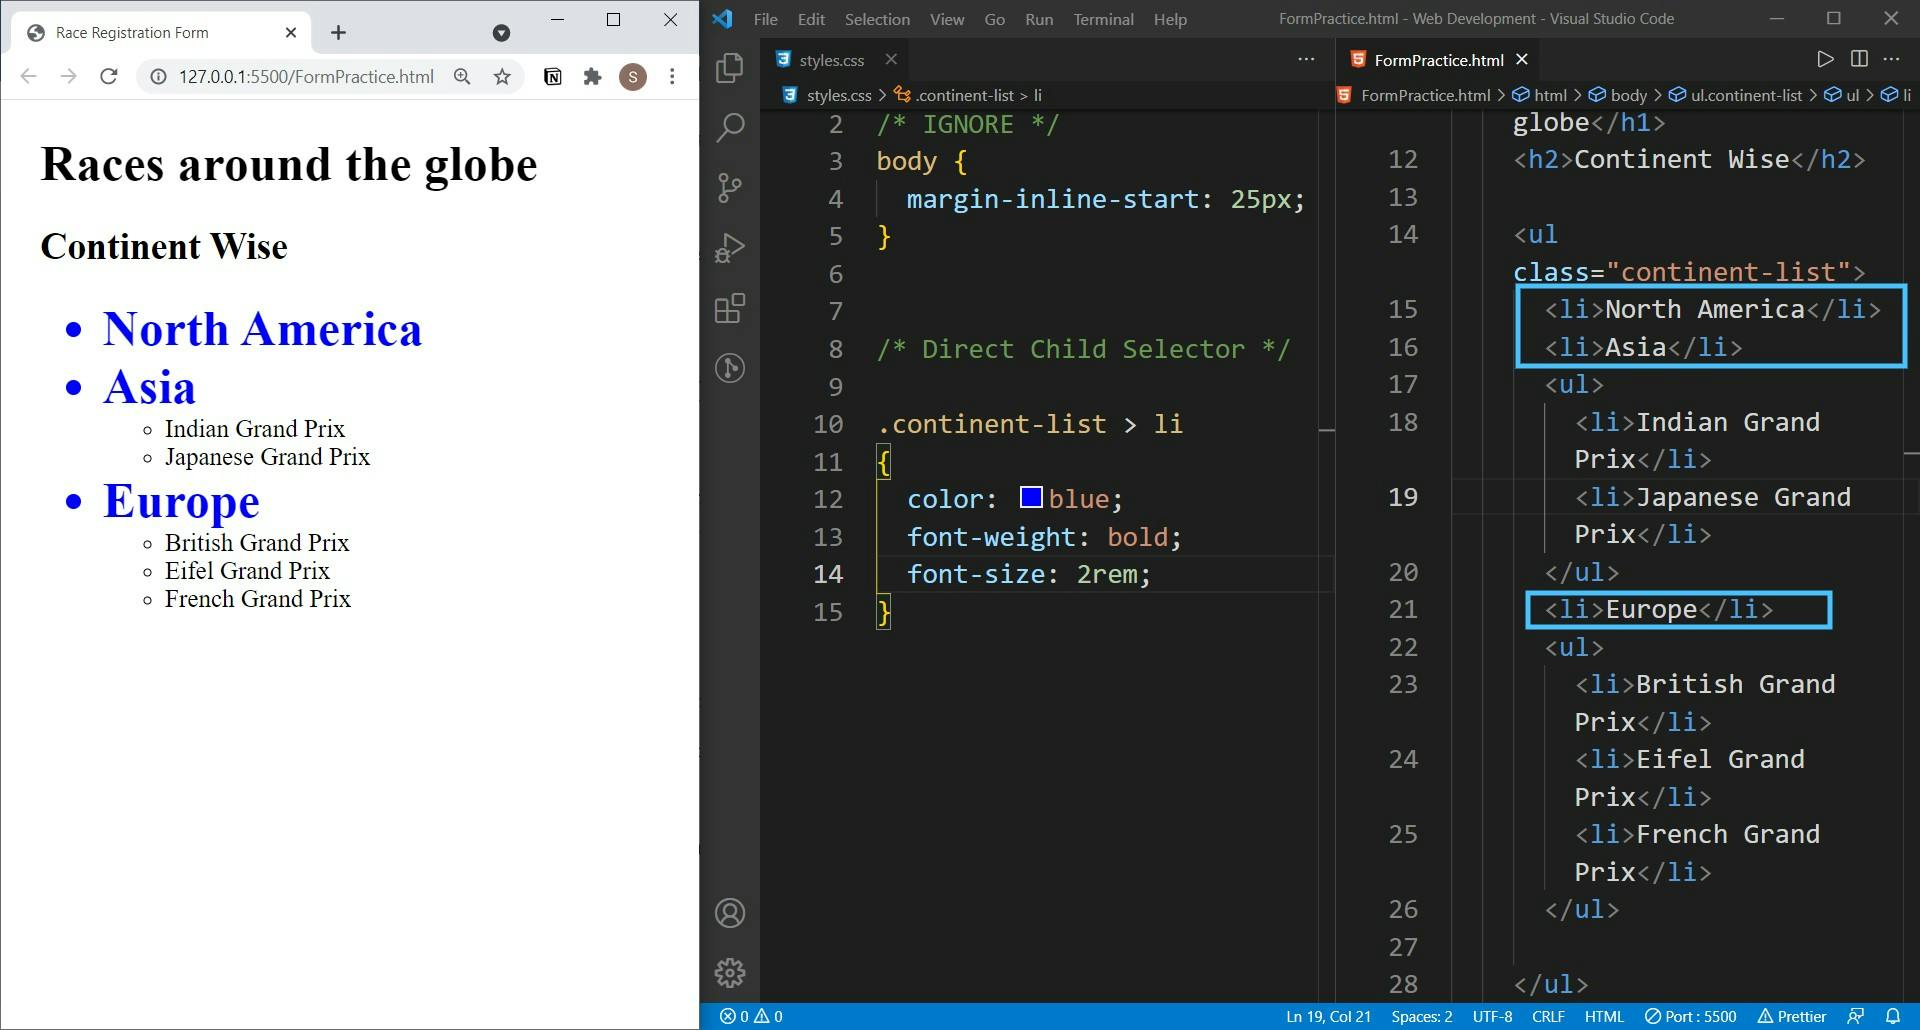
In the above example, only the direct <li> child of <ul> gets affected and the other deeper nested <li> remains unchanged.
That’s all you need to know to begin with CSS selectors. Feel free to deep dive into Docs to learn more. ( I will suggest you to read MDN docs ). Please don’t worry about the different properties and their values used in the examples, just focus on the basic concepts explained. I will break down important properties in my upcoming blogs of this series.
If you find this blog helpful do like, share and comment. This will motivate me in my journey of blogging. Any feedback & suggestions are always welcome 🙂. Thank you so much. Keep Learning 🎉