

Hey Everyone 😃, welcome to the second blog of the "Learning CSS the Practical Way" series. In the last blog, I discussed the most practical way to get started with CSS. Through this blog, I am going to explain a crucial concept in CSS called CSS Specificity.
We already know how to write Basic CSS Styles. But while applying various styles you may have noticed that sometimes the applied style doesn’t produce the desired result. After scratching your head for a long time you finally find that your desired style was overwritten by some other style. This happens due to CSS Specificity. Now, it might sound like an alien term but believe me after reading this blog, you will feel confident about the CSS Specificity and it will surely save you a lot of time.
So, Let’s understand what it means. Whenever there are conflicting styles targeting the same element, CSS Specificity is by which the browser decides which rules to apply. Specificity is a measure of how specific a given selector is and
The more specific selector "wins"
On this concept, the practical thing to remember is: {Decreasing order of priority}
ID Selector > Class Selector > Element Selector
This concept is extended to be:ID Selector > Class, attribute & pseudo-class selectors > Element and pseudo-element selectors
Although it’s a bad practice, if an inline style is applied then it has the highest priority. So, the rule becomesInline Styles > ID Selector > Class, attribute & pseudo-class selectors > Element and pseudo-element selectors
Let’s consider few scenarios,
a. If there are two selectors of the same level/priority but different in nos, then the selector having a higher value prevails.
For ex: If there is one element selector and in the other, there are two-element selectors then the second one will prevail.
b. For targeting one element, there may be 10 element selectors used but even if there is 1 class selector then the styles applied by the class selector will be displayed.
Number matters only when the selectors are of the same level.
Tip: Whenever we have to compare between two different selectors then first we will check their levels. The higher-level selector will win.
If they are of the same level only then we will check the number of selectors.
Below are some code examples to make your understanding clearer,
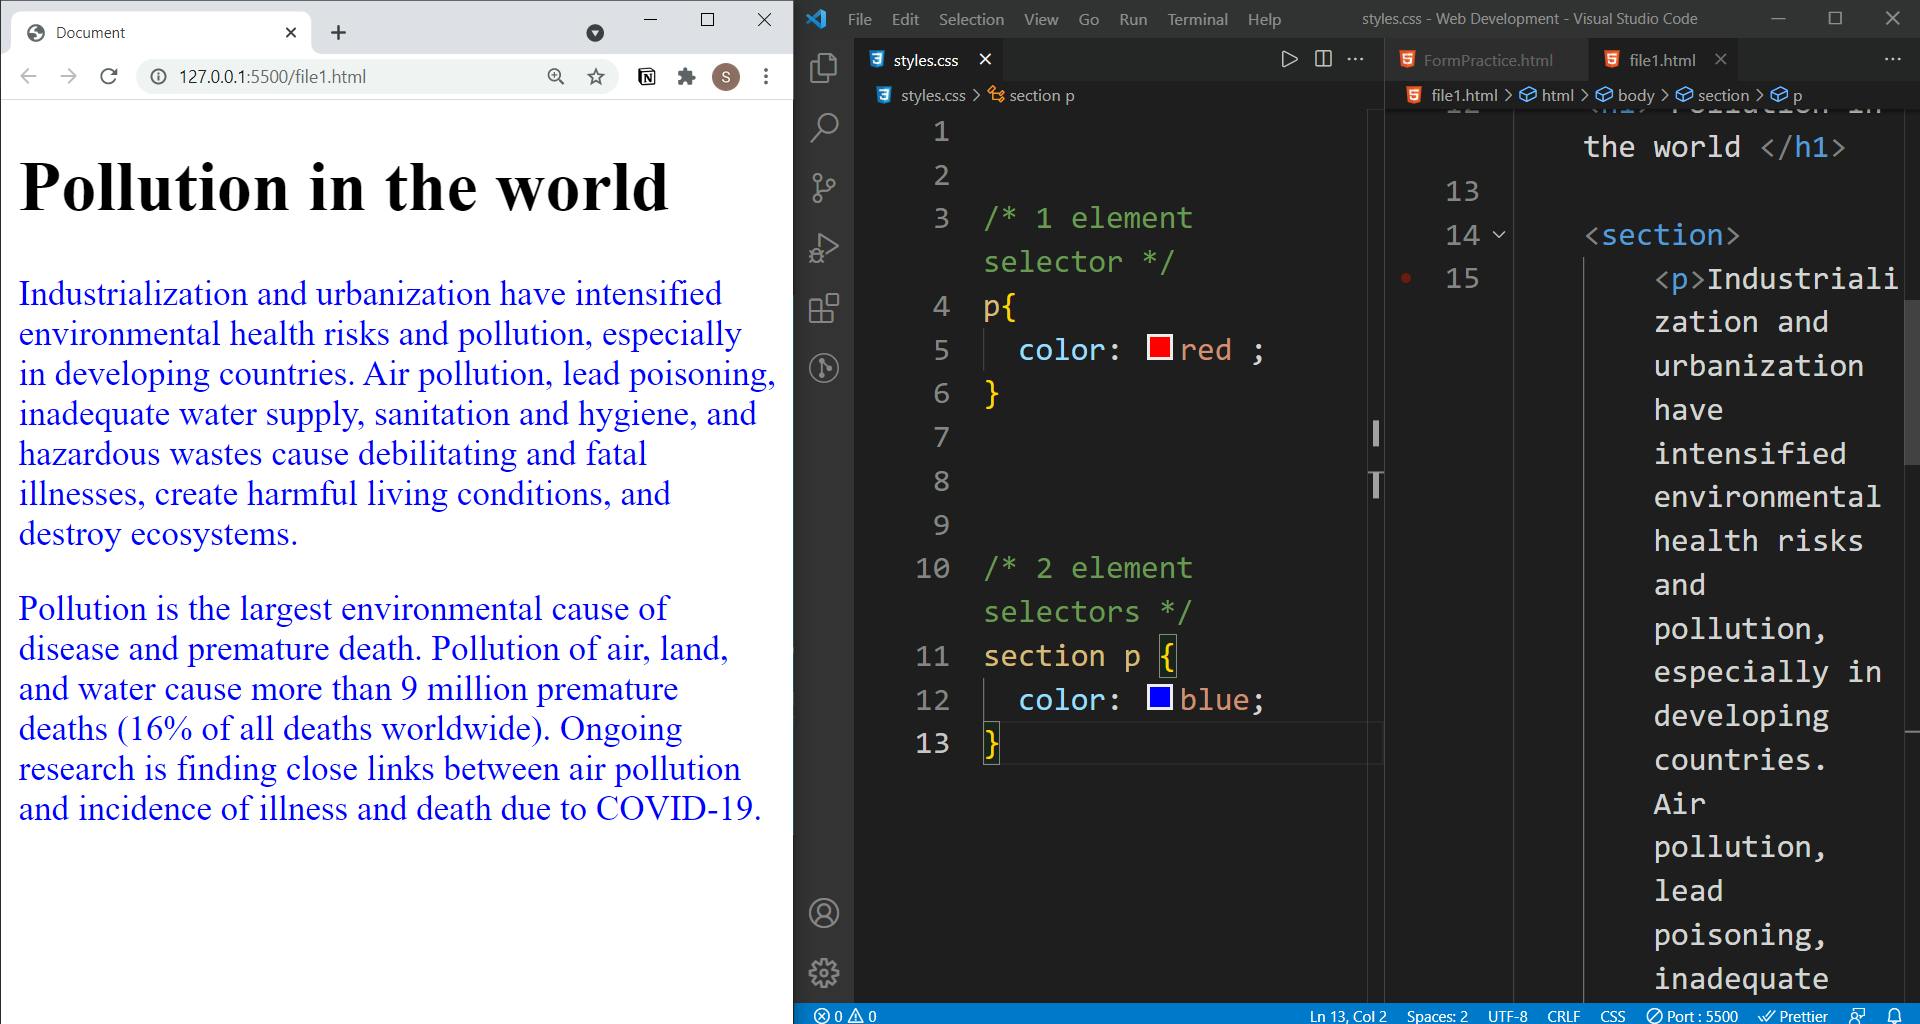
a. 1 vs 2 element selectors
Since the selectors are at the same level, we compare their numbers and thus the selector having two element selectors wins.
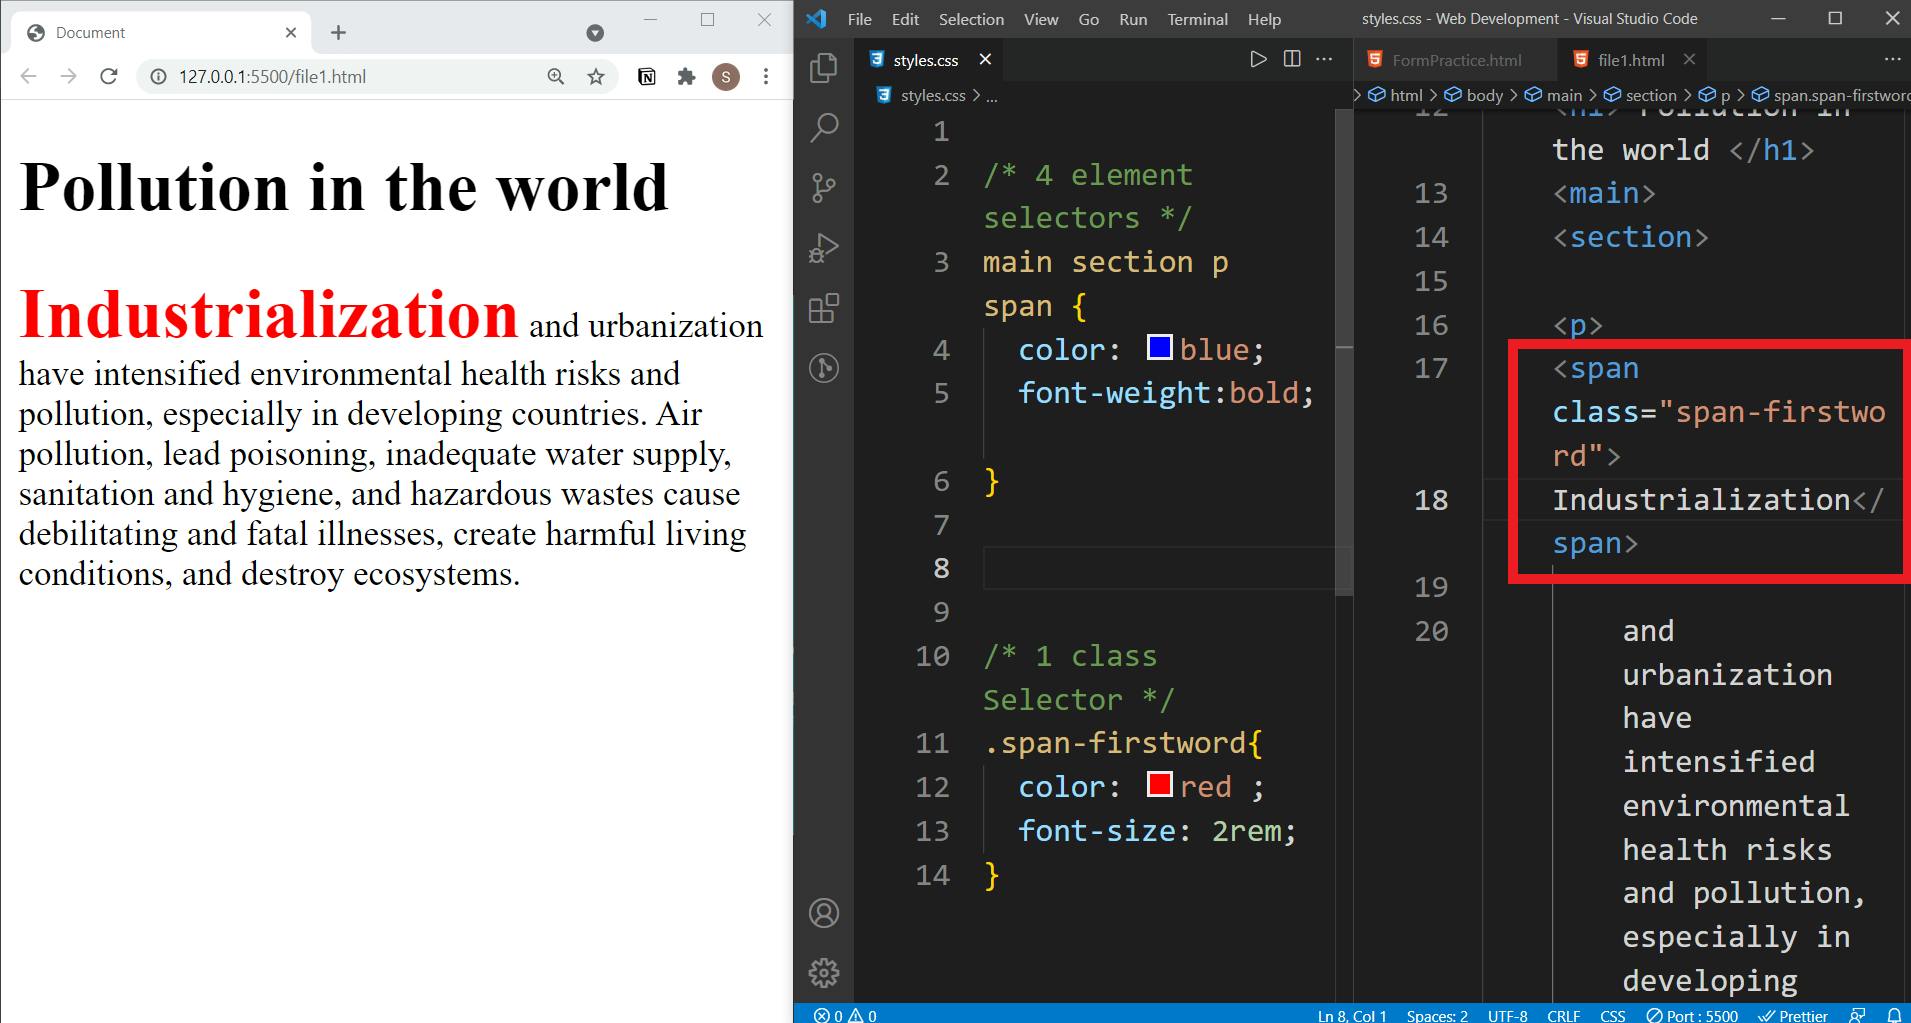
b. 1 class selector vs 4 element selector
Since the levels of selectors are different, the higher priority selector wins.
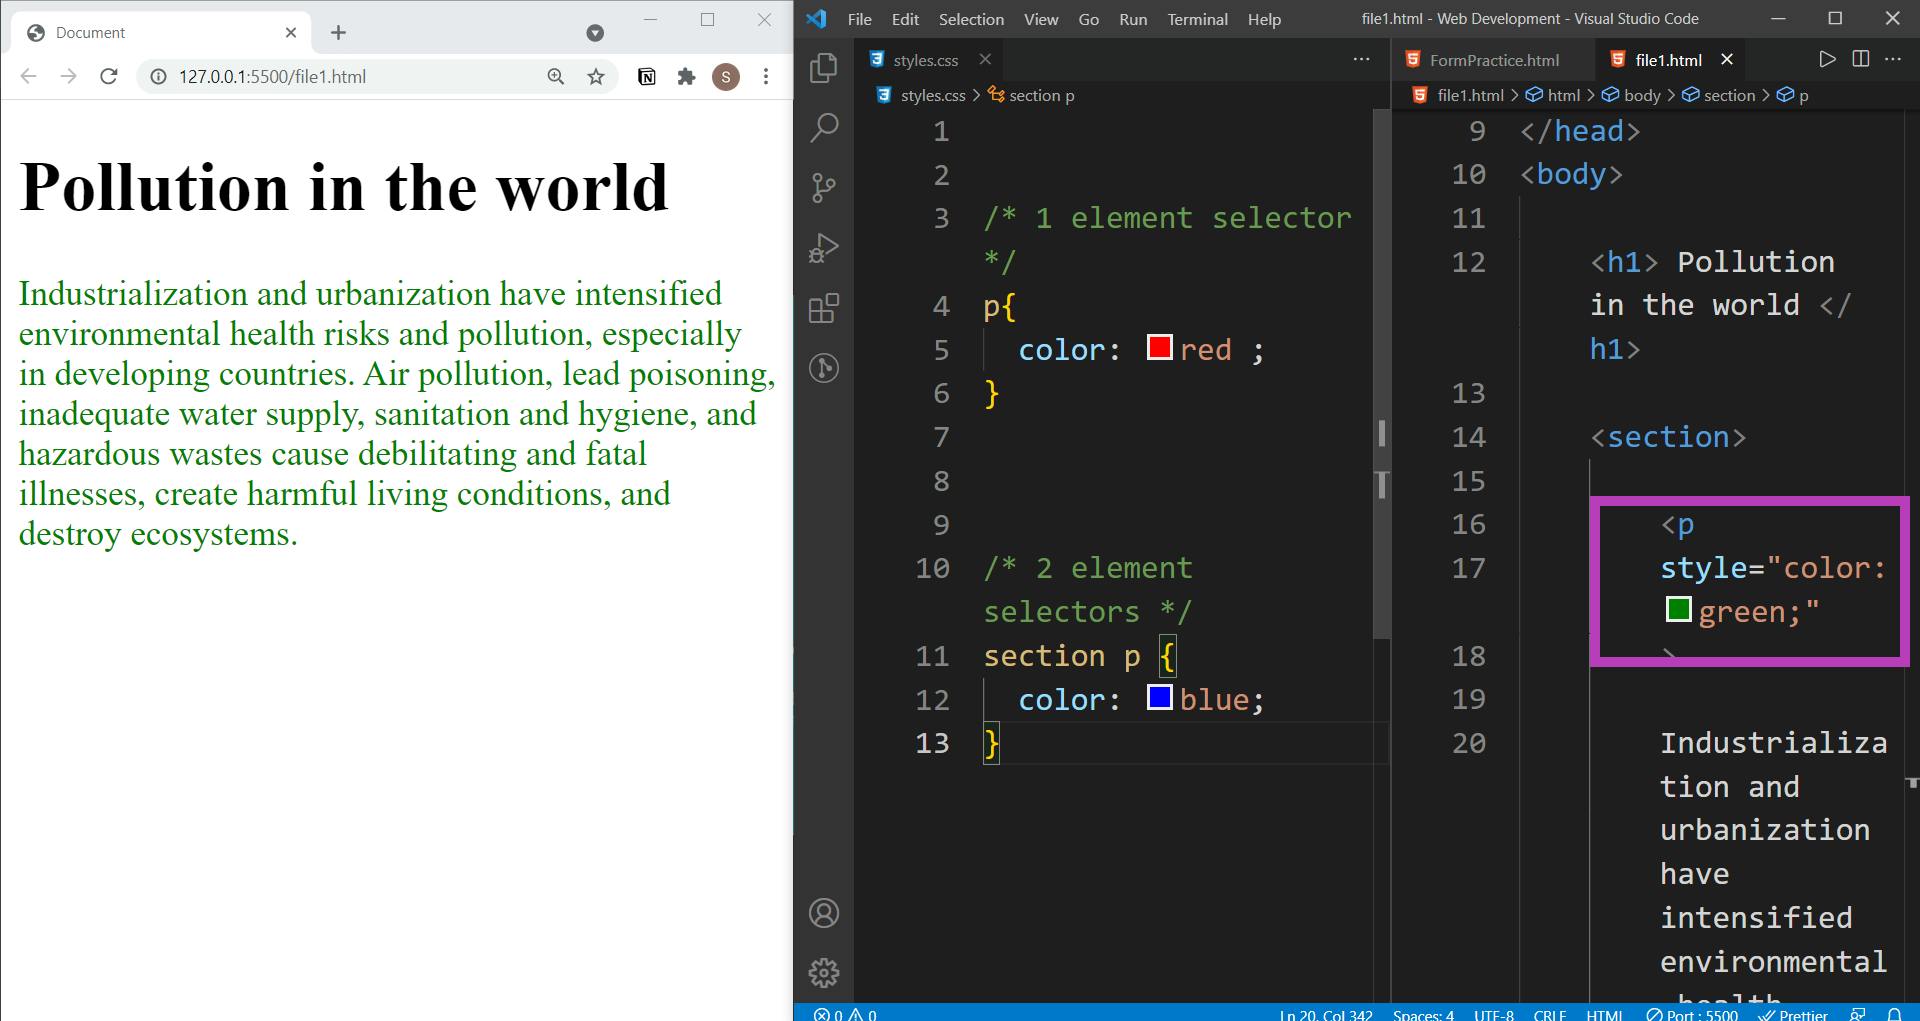
c. Inline selector has the highest priority.
That’s all you need to know about CSS Specificity. Feel free to deep dive into Docs to learn more. You can also compare the strength of the selectors on this website. It's just a fun way to play around the strength of selectors.
If you find this blog helpful do like, share and comment. This will motivate me in my journey of blogging. Any feedback & suggestions are always welcome 🙂. Thank you so much. Keep Learning 🎉